skip to main |
skip to sidebar
Last Thursday Aditya and I attended a cooking class at our favorite pan-Asian restaurant, Spize Cafe in downtown Raleigh. Their super talented chef and owner Meechai showed us how to make lemongrass pork rolls, tom kha soup and tilapia in a panang curry. All of which, though I must admit I am a little too partial towards the tilapia, were amazing.
I had been meaning to write about restaurants in the Triangle (Raleigh-Durham-Chapel Hill) area that I really like but never got around to doing so. This cooking class gave me the perfect opportunity to change this and no better place than to start this off than Spize!
Spize serves mostly pan-Asian flavors concentrating on Thai, reflecting chef Meechai's roots. Other than the delectable fare what attracts me to this place are the very hospitable owners, Meechai and his lovely wife Jacq. Meechai is a software engineer by day and chef by night and if that in itself is not commendable, then its definitely his passion for perfection. We learnt at the class that everything from the spice powders to the stocks to the bread is made from scratch. The difference this attention to detail makes is evident in the taste. His commitment also extends to being environmentally friendly, the marble tabletops are from reclaimed material and the tableware is from corn by-products.


We always tend to draw analogies with what we are familiar with. Since Indian food is what I grew up eating the most, I find myself drawing many analogies to it. Like in this case. Mujadara is Middle Eastern comfort food. It has basic ingredients, is simple to make and to me it is very similar to the Indian khichdi. It has rice and brown lentils cooked with some aromatic spices and mixed with a generous helping of caramelized onions. Tatziki is a creamy yogurt and cucumber sauce that to me is very similar to the Indian raita. It is made with cucumber, mint and garlic all mixed in thick Greek yogurt and served cold. It is a great side for the mujadara or as a dip for pita bread or a topping on some Middle eastern spied burgers. Both are extremely popular in the Middle East so much so that the origins of each is a topic, hotly debated!
Mujadara and Tatziki, together make one of my most favorite meals, especially on hot summer days. The coolness of the cucumber and yogurt is a perfect balance to the wholesome rice and lentil mixture. As the temperature rises I find myself craving for this, especially at lunch. Neomonde deli and bakery which is one of my favorite lunch places in the Triangle area does a great job at satisfying these cravings. In their version of Tatziki dried mint is used. If you have any on hand, feel free to use that for a more authentic taste. I didn't have any so I used fresh mint instead. The result was just as good.
This meal is satisfying, delicious and did you notice? Meatless! Going meatless even once a week can do a huge amount of good for us and our planet. Many restaurants, chefs and food bloggers have been participating in this worldwide movement by going meatless on Monday. I have decided to follow suit and I will be sending this as my first entry for Meatless Mondays.
Mujadara:
1 cup brown or white rice (preferably long grained)
1 cup brown lentils
2 cups water or vegetable stock
1 tablespoon olive oil
1 large onion sliced
1/2 teaspoon cumin powder
1/4 teaspoon paprika
1 cinnamon stick
1/2 teaspoon salt
1 teaspoon sugar
- In a stock pot, cover the lentils with water. Add half of the cinnamon stick and cook till tender. Be careful as to not overcook these. Once the lentils are cooked, add salt, paprika and cumin powder and mix well.
- While the lentils are cooking, in a separate wide bottomed pan, heat the olive oil and spread the onions evenly. Let them sit for a couple of minutes without stirring so as to get the bottom layer brown. Then stir to mix the top layer with the bottom and sprinkle with a teaspoon of the sugar. Stir till all the onions are evenly brown. Remove and set aside on a paper towel.
- In the same pan, cook the rice with 2 cups of water or vegetable stock and the remaining half of the cinnamon stick.
- Mix the rice, lentils and three fourth of the caramelized onions together.
- Serve topped with the rest of the caramelized onions.
Tatziki
1 cup greek yogurt
1 medium sized cucumber
1 small garlic clove
1/4 teaspoon salt
1 tablespoon mint, finely chopped
- Peel the cumber, slit lengthwise and remove all the seeds. Chop evenly.
- Grate the garlic into the yogurt, add in salt and mint. Mix in the cumber and serve chilled.
Strawberry season is in full swing. If you were at any of the local farmers markets I mentioned in my earlier post, you would find them in copious amounts. We have been getting tons from the North Hills farmers market and overdosing on them. We have been diligently heading the advice that its best to eat them fresh and on the same day as they are bought so very few make it to the day after! Its like eating a potato chip, you cannot stop at one. By the way, did you know that eating only one serving of strawberries (about 8) provides more Vitamin C than an orange?
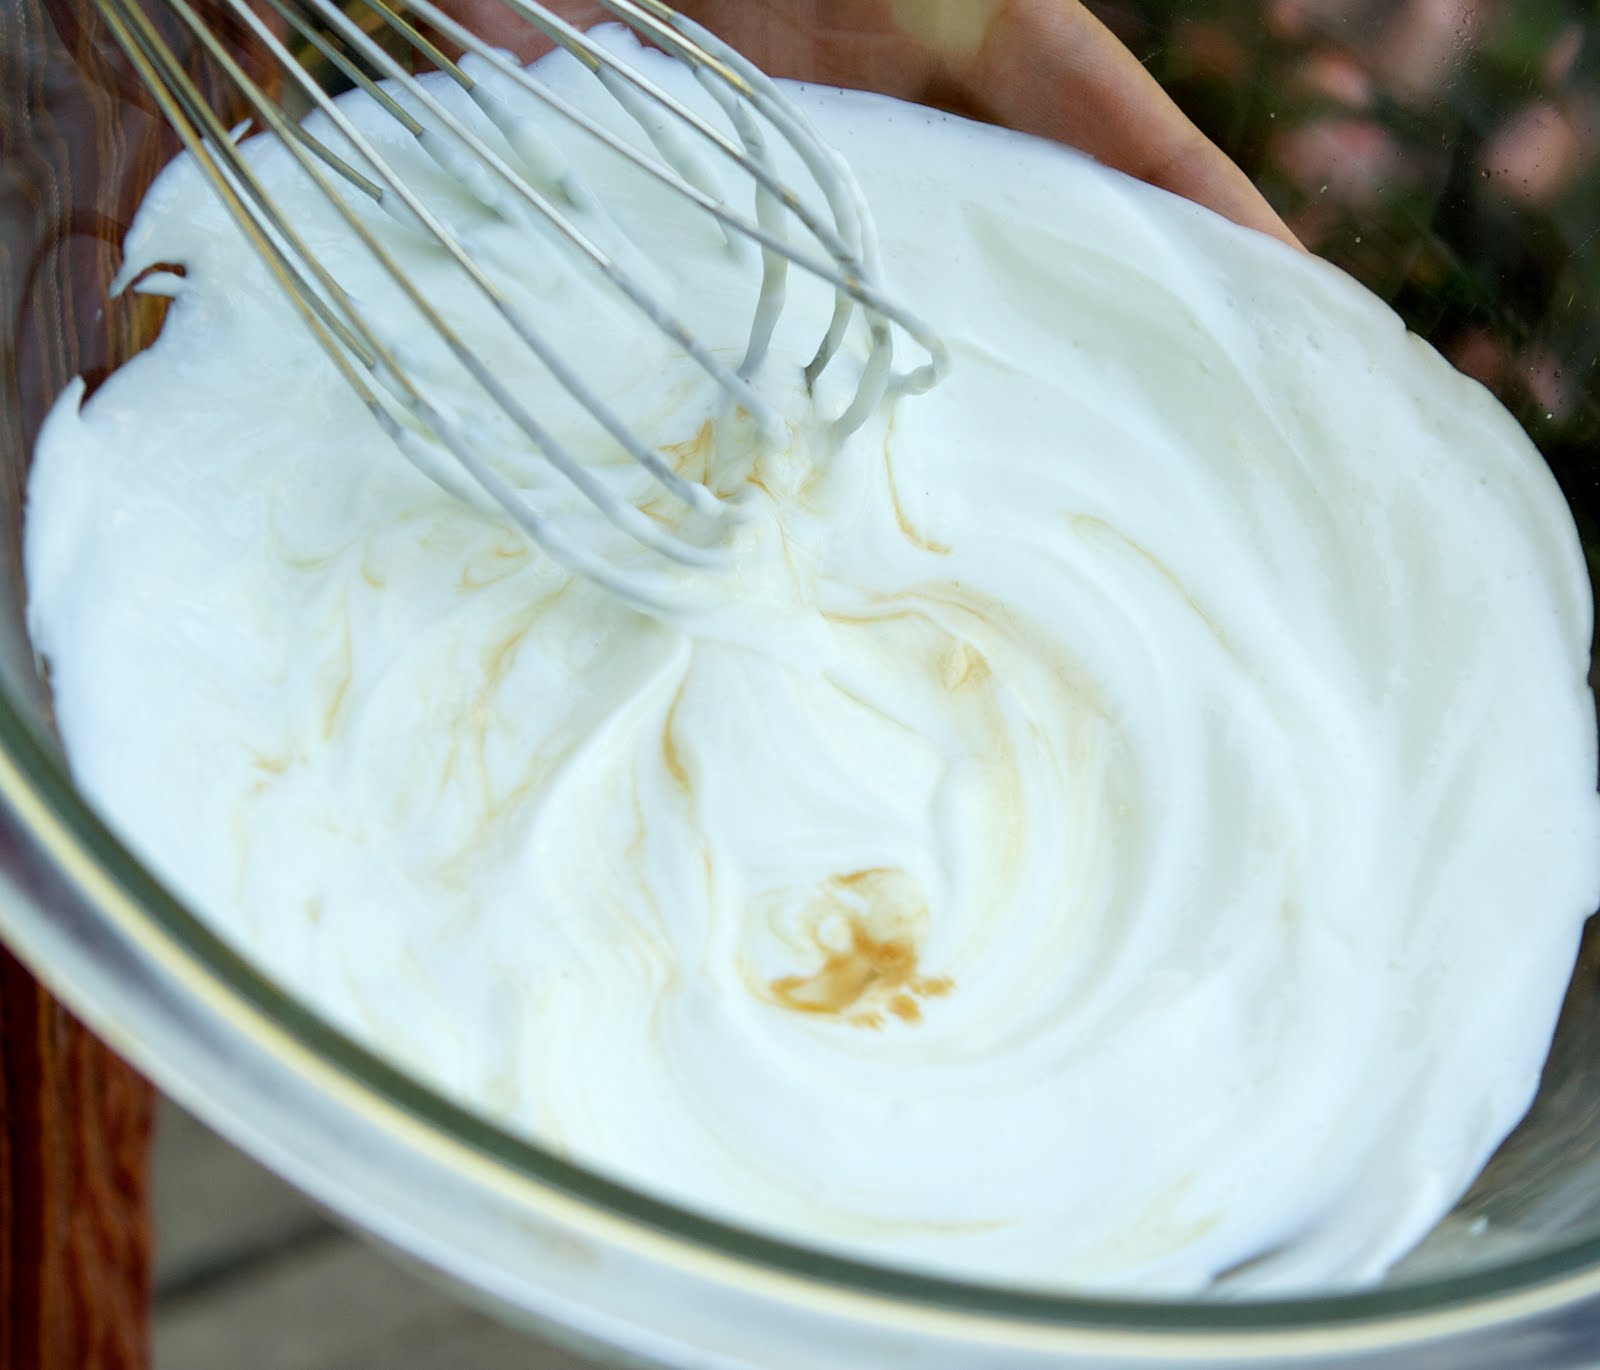
After blending them into smoothies and eating quite a few in their natural state, I couldn't wait to cast them as the star ingredient in a dessert. At the same time though, I did want to maintain their natural flavor as much as possible. The solution? This strawberry short cake inspired by a recipe from Nigella Lawson's cookbook, How to be a domestic goodess: baking and the art of comfort food, which by the way, is a great book with lots of doable and delicious recipes. The strawberry shortcake picture in the cookbook really caught my eye, a flaky shortcake halved and stuffed with strawberries, topped with a dollop of cream. It looked so pretty that I had to give it a try and it was delicious! The original recipe called for whipping cream which I substituted with Greek yogurt for a healthier and lighter version. If you haven't used Greek yogurt before you must give it a try. Its basically a really thick version of regular yogurt which you can get if you hang it overnight to remove excess water. It is a great substitute for sour cream or heavy cream. Here I whisked it with some honey and vanilla extract to top the strawberries with. Trust me, the result was just as good and the heavy cream was not missed! For a more decadent version, vanilla ice-cream cream would work really well in place of the yogurt. If you like chocolate and berries together, drizzling some chocolate syrup would be a nice idea too. Either way do give this a try!

Ingredients:
Note: The recipe below is my modified version from the original recipe from the cookbook. The original recipe called for unsalted butter and half teaspoon salt. I also used yogurt in place of light cream for the shortcakes and heavy cream for the topping.
2 cups plus 2 tablespoons all-purpose flour
1 tablespoon baking powder
5 tablespoons sugar
1/2 cup butter, frozen (I used Smart Balance)
1 large egg
1/2 cup non-fat Greek yogurt or plain yogurt hung overnight
For the filling:
1 and 1/2 cups strawberries
1 tablespoon sugar
few drops of balsamic vinegar (optional)
1 cup non-fat Greek yogurt or plain yogurt hung overnight
2 teaspoons honey
- Line a baking sheet with parchment or wax paper and preheat the oven to 425F.
- Mix flour, salt (if using), baking powder and 4 tablespoons sugar in a bowl.
- Grate the butter into these dry ingredients and use your fingerprints to finish crumbling the butter into the flour.
- Whisk the egg into the yogurt and pour into the flour mixture while kneading into a dough. You may not need all the egg-yogurt mixture to make the dough come together so use cautiously.
- Turn the dough onto a lightly floured surface and roll gently to a thickness of about 3/4 inch.
- Dip a 2 1/2 inch round cookie cutter into flour and cut out as many rounds as you can. Work the scraps back into a dough, re-roll and finish cutting out, you should get 8 in all.
- Place the shortcakes about 1 inch apart on the baking sheet, sprinkle with the remaining sugar and bake for about 10-15 minutes or till they are golden brown.
- Let them cool on a wire rack for around 5-10 minutes.
- For the filing, crush half of the strawberries with the spoonful of sugar and the few drops of balsamic vinegar if using and halve or quarter the remaining strawberries depending on their size.
- Whisk the yogurt with vanilla extract and honey.
- To assemble the shortcakes, split each one across the middle and cover with a spoonful of the crushed strawberry mixture, a few halved or quartered strawberries, then dollop some yogurt or whipped cream on top and set the top back on.
Makes 8.
Summer is without doubt my most favorite time of the year and I know that even though its still spring here in North Carolina, its been feeling kind of like summer already. Other than the warm weather, there is much to love here. Open air farmers markets, tons of fresh produce, outdoor meals and drinks on the patio. All in all it just makes me feel like good times are in store.
Summer is also a great time to start being more of a 'locavore'. There is an abundance of fresh produce in the various farmers markets around the area and they provide a great opportunity to try stuff you might have never tried before. Eating locally and eating seasonally will almost always guarantee that you are eating well. If you are in the Triangle area and are looking for a farmers market close to you, here is a list that might help.
- State Farmers Market
- North Raleigh Farmers market
- Midtown Farmers Market at North Hills
- Five Points Community Farmers Market
- Durham Farmers Market
- Cary Farmers Market
Summer here though does get quite hot so my focus this season will be on recipes that require none or very little "on the stove" time. I am also hoping to experiment with some cold soup recipes, mainly because I like soups way too much to relegate them only for cold weather. This recipe here is one step in that direction though it does taste just as good when served hot. This recipe like quite a few here was inspired by a recipe for carrot and ginger soup that I saw in the latest issue of the Bon Appetit magazine. The original recipe was served with a chile butter and topped with peanuts. I omitted the chile butter and gave it a little bit of an Asian twist by adding some peanut butter, mixed with honey and red chili flakes. If you are not a big peanut fan, I think using almond butter would work just as well. The result is a smooth and velvetty textured soup with just a hint of sweetness and spice. Topped with some fresh cilantro and accompanied with toast and salad, it makes the perfect summer meal.
Ingredients:
1 tablespoon olive oil
4 carrots, peeled and chopped into 1/4 inch thick rounds
1/2 onion, chopped
1 tablespoon fresh minced ginger
1 potato, diced
2 cups low sodium vegetable broth
2 cups water
2 teaspoons peanut butter
1/2 teaspoon honey
1/4 teaspoon red chili flakes
1/2 teaspoon salt (or lesser depending on the salt in the vegetable broth)
- In a heavy bottom stock pot, heat olive oil. Add chopped onion, minced ginger, diced potatoes and carrots.
- Sprinkle the vegetables with salt and saute for about ten minutes or until they are slightly softened but not browned.
- Add the broth and water, bring to a boil and cook covered for about 20 minutes or till the vegetables are cooked through.
- Cool slightly, then puree in batches. Return blended soup to the stock pot.
- Whisk peanut butter and honey with the red pepper flakes. Add to the soup and stir well, avoiding any lumps to form with the peanut butter.
- Bring to a simmer and get off the heat. Serve warm or cold topped with chopped cilanto and toasted peanuts.
Makes 6 side servings.
I continue my exploration of cuisine de Mexico with this Swiss chard and potato quesadilla. Am I too stuck in time with my trip to Mexico that I cannot seek inspiration elsewhere? Well, that is not exactly true you see. Barely a week after getting back, I had to get a wisdom tooth extracted. For those of you who have gone through this, you may know that after this process, your culinary options are, well, how shall I put it? Limited.
Hence I am sure you will excuse me for another Mexico-inspired entry. Its quite good too and unintentionally vegan. It features thinly sliced potatoes sauteed with some cumin and paprika along with some thinly sliced swiss chard sauteed with onion and garlic. Swiss chard and potatoes make strange bedfellows but not in a quesadilla. They worked great together even without the cheese. If you think a quesadilla cannot be a quesadilla without cheese, feel free to add in some monterrey jack or cheddar. I used the habanero-lime tortillas from Trader Joes which I so love but any tasty tortilla would work well here. The next time I might bake the potatoes to get them a little more crispy. There is not a lot of spice in these so a spicy tomatillo or adobo chile sauce would be on the great. With my current dental condition, I avoided the spice and stuck with a mellow avocado yogurt sauce.
On a different note, with some enforced down time, I found two excellent reads over these last few days. One was the much enjoyable murder mystery, The Case of the Missing Servant by Tarquin Hall. It was recommended by one of my favorite bloggers, Nupur from One Hot Stove and I couldn't wait to read this book after she wrote about it here! And I loved it. It was the perfect mix of mystery and humor set in urban Delhi and what I especially liked was the Hinglish (Hindi English).
The second was Espresso Tales, by one of my favorite authors, Alexander McCall Smith. It is the second volume of his Scotland Street series and is the perfect book to spend a lazy Sunday afternoon with. I do like my fair share of books which search your soul and move your heart, but sometimes you just need a book which is going to make you feel that everything is going to be all right with this world after all. Especially after a wisdom tooth extraction.
Here is the recipe.
4 large tortillas
1 bunch swisss chard, sliced thin
1/2 yellow onion, chopped
1 clove garlic, minced
2 Yukon gold potatoes, thinly sliced
1/2 teaspoon cumin powder
1/2 teaspoon paprika
1/4 teaspoon salt
- Heat olive oil in a heavy bottomed pan and add the thinly sliced potatoes.
- Saute them till cooked, adding salt, paprika and cumin, mixing well to coat.
- While the potatoes cook, in another pan, heat some olive oil and add chopped onion and minced garlic.
- When the onion and garlic softens, add the chard and saute with some salt.
- Add couple of tablespoons of water and cook covered till tender.
- Heat the tortilla, line with potato and chard and fold over.
Makes 4 quesadillas
Isla Mujeres, Mexico is where we spent the better part of the week before last. A small island, only five miles long with the bluest water and whitest sands that I have ever seen. Only a fifteen minute ferry ride separates it from Cancun but it feels like a world apart. Colorful streets, open air bars and restaurants and the beautiful waters symbolize true island living. We spent most of our time around the North Beach (Playa del Norte) area which has the calmest waters on the island and is the perfect spot for lazing around, getting your feet wet, or eating some of the best grilled fish. We did all that and more.
After the first three days on the island we ventured into the mainland to see the Mayan ruins at Coba and Tulum. Both were easy day trips and well worth the effort. We also found some really good eats on the way.
This banana marmalade was one of them and a delicious start to a lovely day in one of the local Isla Mujeres cafes. Marmalade for me always meant oranges till I encountered this one. This was unlike anything I had tasted before. In our broken Spanish we managed to decipher the ingredients from the friendly cafe owner. I am so glad we did because it was so simple to put together and yet so delicious. It was served with some warm oven baked rolls but back home we had it on some toasted English muffins and it was equally good. It would also be nice on pancakes or waffles. Its not really a recipe but more of an ingredients list with one step!
Banana Marmalade
(Best when served fresh, can be refrigerated for 2-3 days)
Ingredients:
1 cup mashed banana
1 cup grated pineapple
2 tablespoons shredded coconut (fresh works best)
1/4 teaspoon honey
1/4 teaspoon lemon juice (to preserve the color of the bananas)
- Combine all ingredients together, mix well and serve.
Isla Mujeres highlights: Red chilli (aquillo pepper topped) grilled fish at Picus Cocteleria, the beach at Playa del Norte, grilled fish (tixin xic) at Playa Lancheros in Isla Mujeres South, walking around or golf carting around the island, Tacos at Medina Taqueira, Breakfast in Cafe Hidalgo (terrific coffee and crepes).
I am back after another longish break from blogging but this time it wasn't work that got in the way. Something much more exciting, we were out on vacation. It was sun, sand, lots of great food and drink. I come back slightly darker than before (some may say sunburnt), recharged and refreshed and armed with lots of recipes that I can't wait to try. That will have to wait for another post though as today it will be back to Bombay for a recipe from my Mum's armoir.
This recipe was a favorite of ours while growing up. It could make a great Sunday lunch, a quick weeknight dinner or if we were really lucky a weekday lunch. It never failed to satisfy no matter when you ate it. This was also one of the first things I learnt to make when I started living by myself and its simplicity never ceased to amaze me. Don't let the name fool you, its no complicated roast chicken. In fact its not even roasted. I am not sure why my Mum called it roast chicken but it worked for her so I am not messing with the name. Anyway its just cooked on the tava (griddle) till it gets all browned up. Here is how it works, you marinate the chicken, put it in a pan and cook it till its done. Then you deglaze the pan, shred the chicken and throw it in the pan for an extra juicy, well integrated flavor. The possibilities are endless!
Here is how I have tried it so far:
- On top of brown rice with some vegetables for a complete meal.
- Rolled up in a chapati/tortilla wrap with some onions, cilantro and lemon for a quick chicken kathi roll (as close as you can come to it)
- With couscous and a greek salad.
It would also be nice as:
- A very tasty sandwich filling
- On top of a pizza for an Indianized chicken tikka pizza
If you do give this a try and come up with some more brilliant ways of putting this to use, let me know. Here is the recipe:
Ingredients:
Note: Boned in chicken works best here.
4 big chicken pieces with bone
1/2 cup yogurt (I used plain non-fat)
1/2 teaspoon ginger and garlic each
1 teaspoon red chilli powder
1/4 teaspoon turmeric powder
1/2 teaspoon garam masala powder
1/2 teaspoon salt
Juice of half a lemon
- Combine all ingredients for the marinade together.
- Marinate the chicken for atleast 30 minutes (longer the chicken marinates, better the flavor). Marinating overnight works best.
- Heat a heavy bottomed pan and coat with oil.
- Add chicken pieces along with the marinade. Cook covered till the moisture disappears and chicken is browned and cooked, turning in between.
- Remove chicken pieces, add a little water to the pan to deglaze. Bring the sauce to a boil.
- Shred the chicken and add back to the sauce. Cook for another 2-3 minutes.
Serve with brown rice or wrapped in a chappati.